Wide field of view projection in a rectangular room
Written by Paul Bourke
July 2005
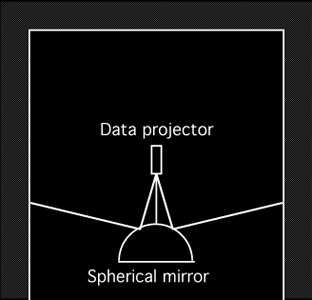
It is easy to imagine how a single data projector and a spherical mirror can
scatter light through wide angles. This can be used to provide a low cost projection
solution for immersive displays where a wide field of view needs to be projected.
The more expensive traditional solutions employ a fisheye lens or multiple projectors
with their images optionally
edge blended together.
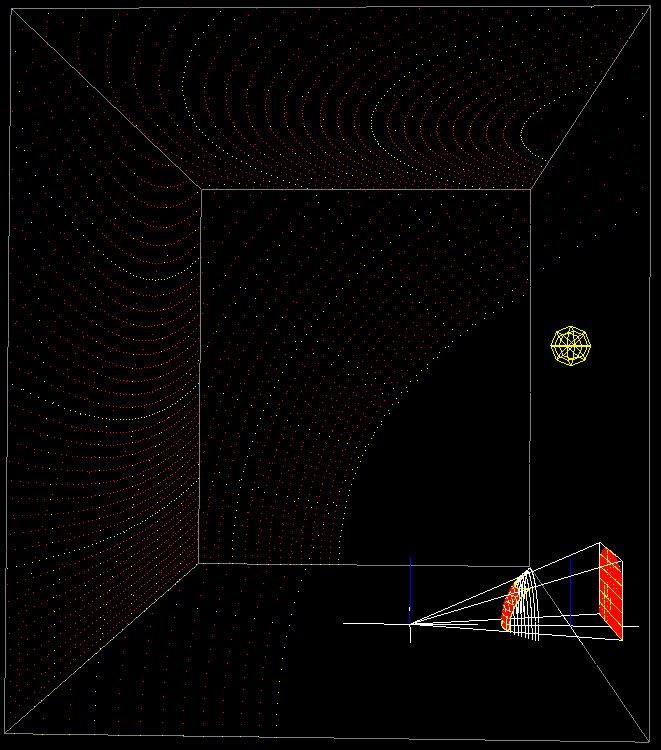
Top view
|
Left view
|
Lighting simulation
Top view
|
Left view
|
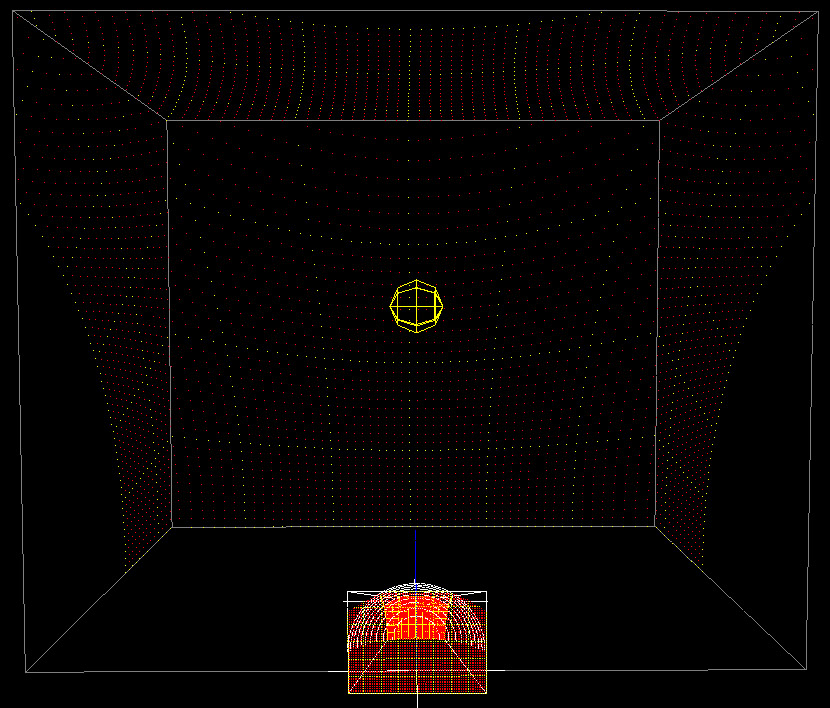
Front view
|
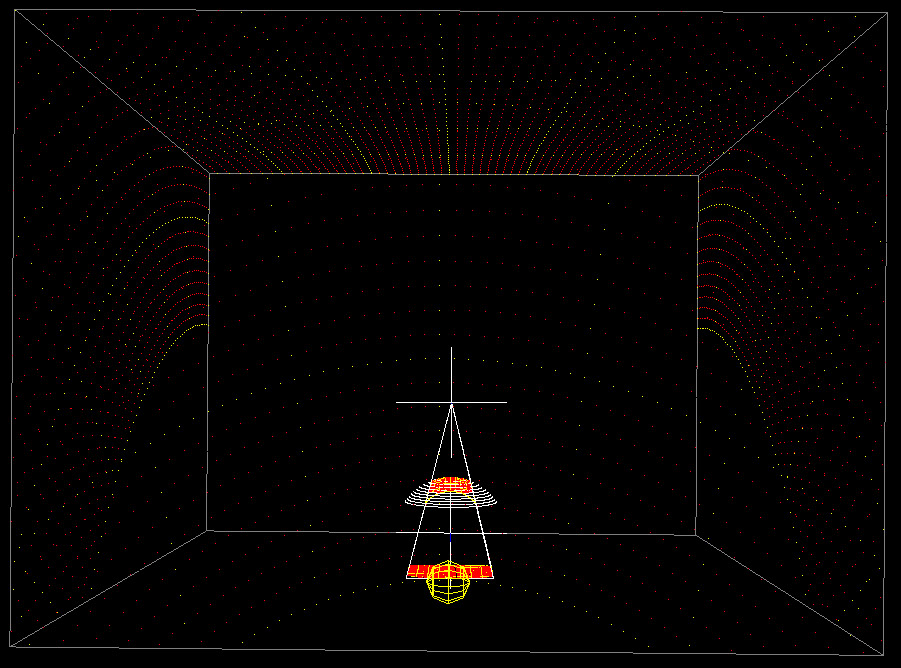
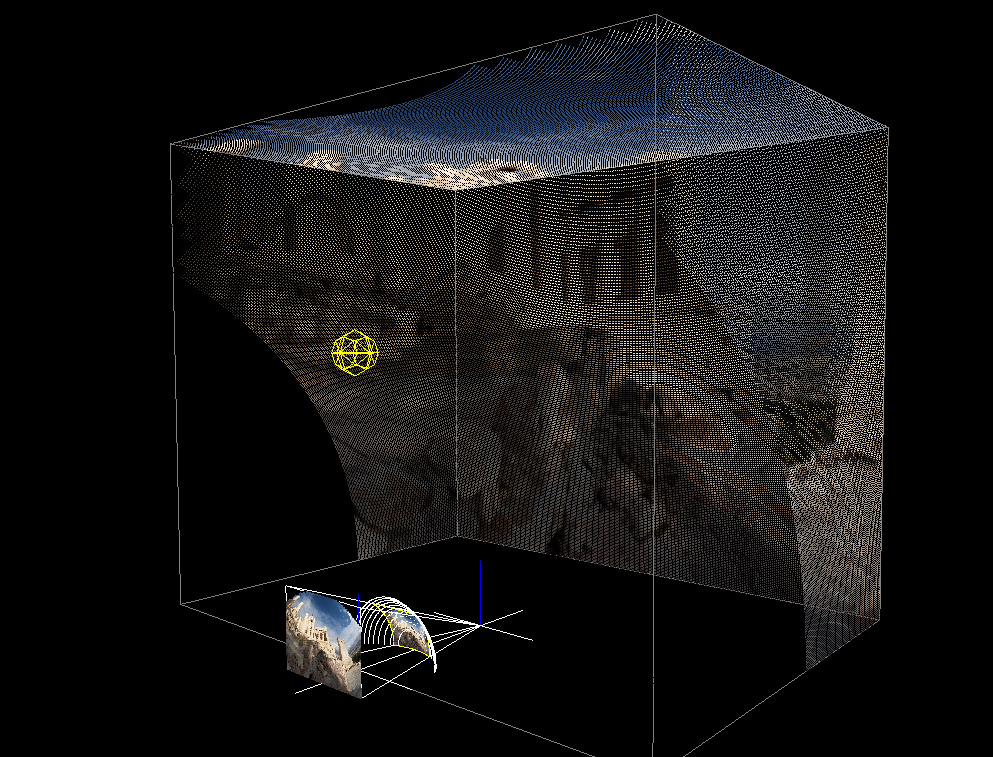
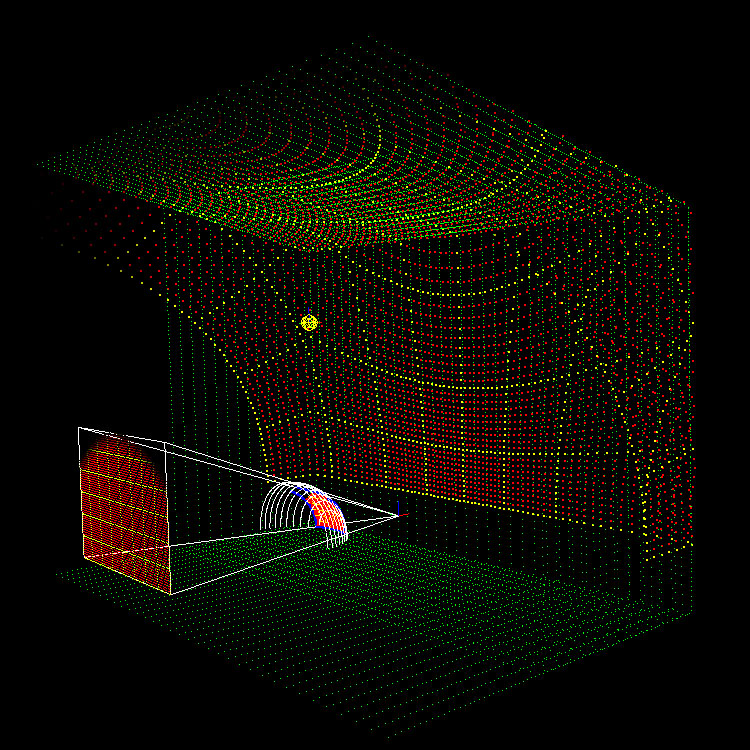
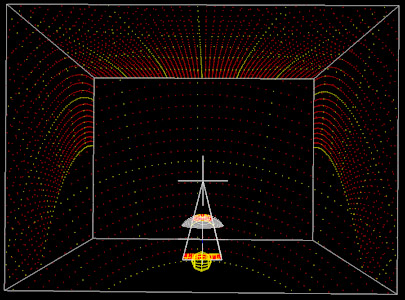
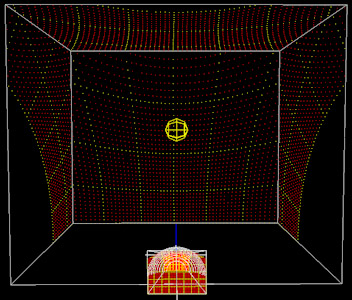
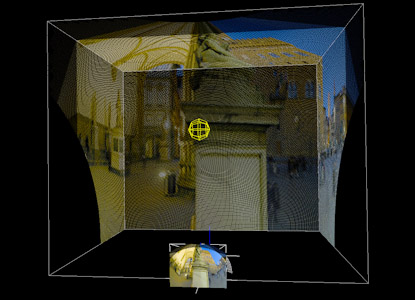
The light spread as shown here is derived by
simulation software, all physical
attributes of the environment are variables to the software including the
observer position. Some variables such as the projector/mirror attributes
can be varied in order to decide upon the effective field of view (FOV).
The output of the simulation software is the warping function required for
a particular input image projection.
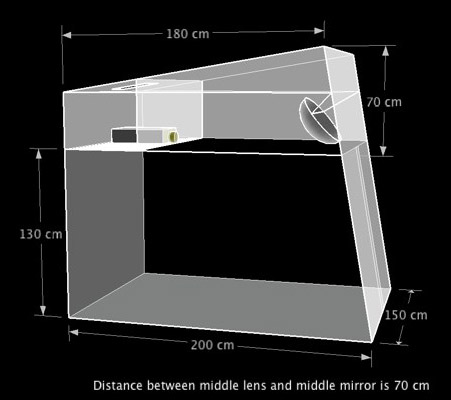
Example room
Width: 3.0m
Height: 2.5m
Depth: 2.2m
Projector aspect: 4:3
Observer position: yellow sphere
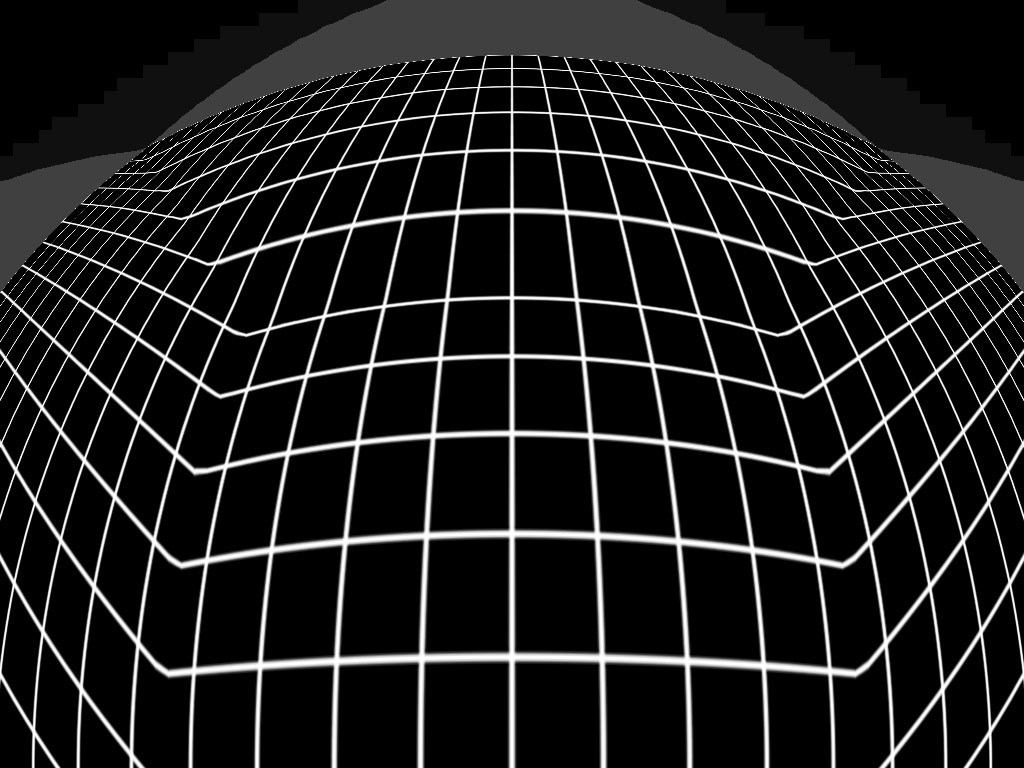
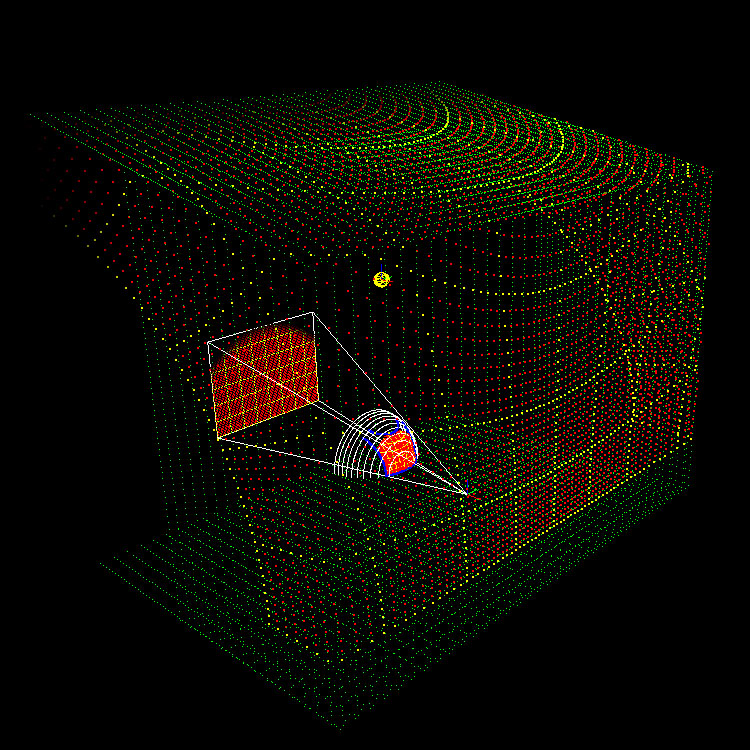
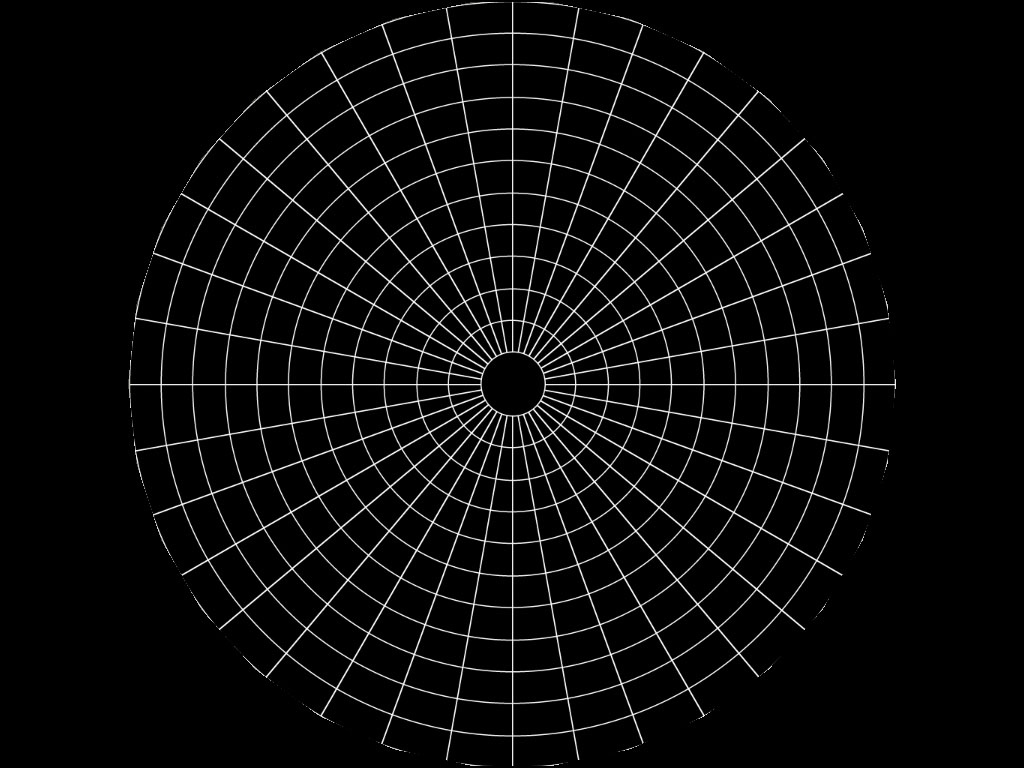
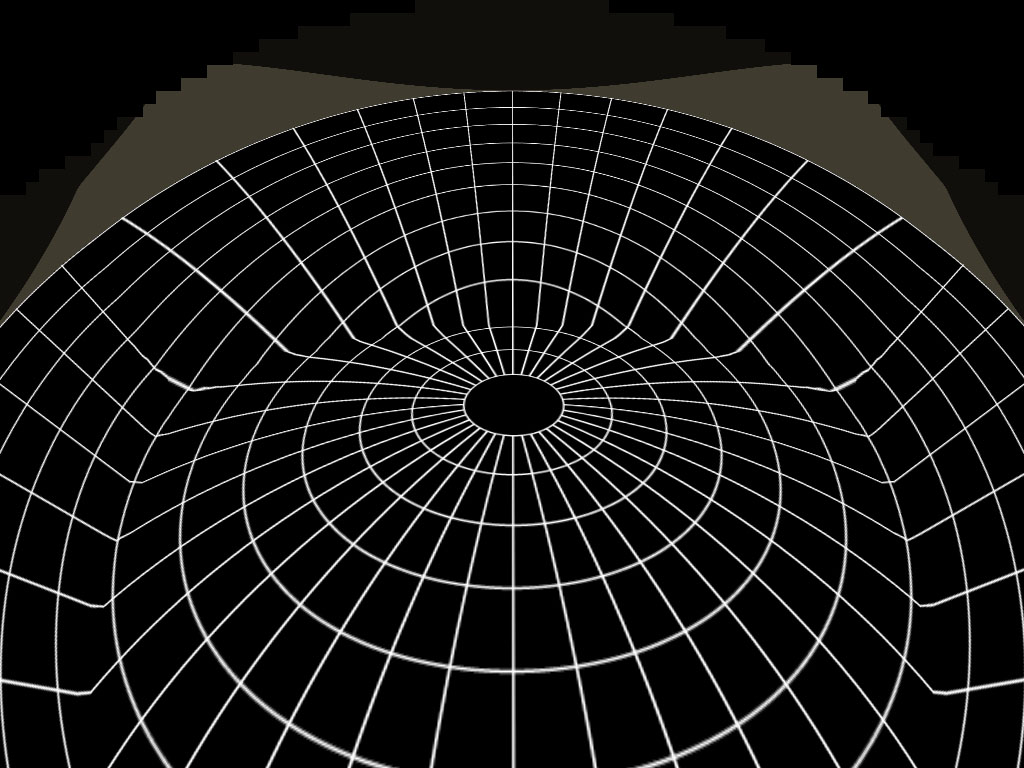
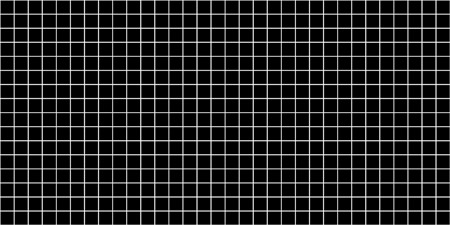
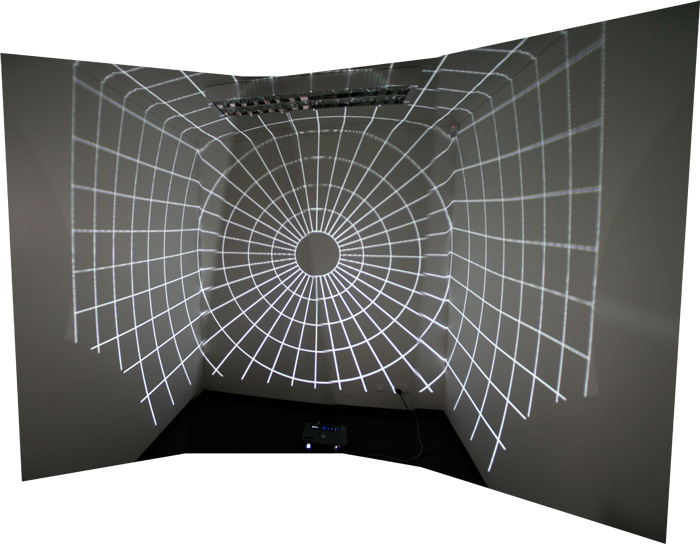
Projecting a regular grid pattern
|
Notes
More or less of the wall surface can be illuminated depending on
the relative distance between the projector and the mirror, also depends
on the throw and zoom of the projector.
If wider wall coverage is required instead of ceiling coverage then
16:9 projectors may be more appropriate.
- Final resolution is largely dependent upon projector resolution and therefore
cost. For example: SXGA+ projections are currently about 6 times more expensive than XGA
projectors for less than twice the number of pixels.
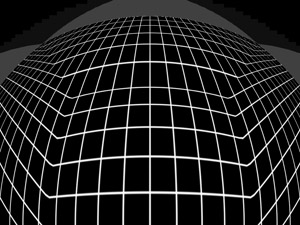
The images above are intended to show the maximum coverage possible given
the particular configuration, in reality the images would be trimmed in such a
way that the edge of the illuminated area on the walls were straight.....maybe.
The warping mesh includes the ability to correct for brightness variation due to different
light path lengths but also due to incident angle on the surface (Gouraud law).
A similar arrangement is possible by mounting the projector and mirror on
the ceiling, thus illuminating the floor and the walls.
Equally, the projector mirror could be tilted to illuminate part of the
ceiling and the floor.
Of particular interest is the possibility of creating an optimal mirror shape
that would fill the space, rather than using a standard spherical mirror.
[A future project]
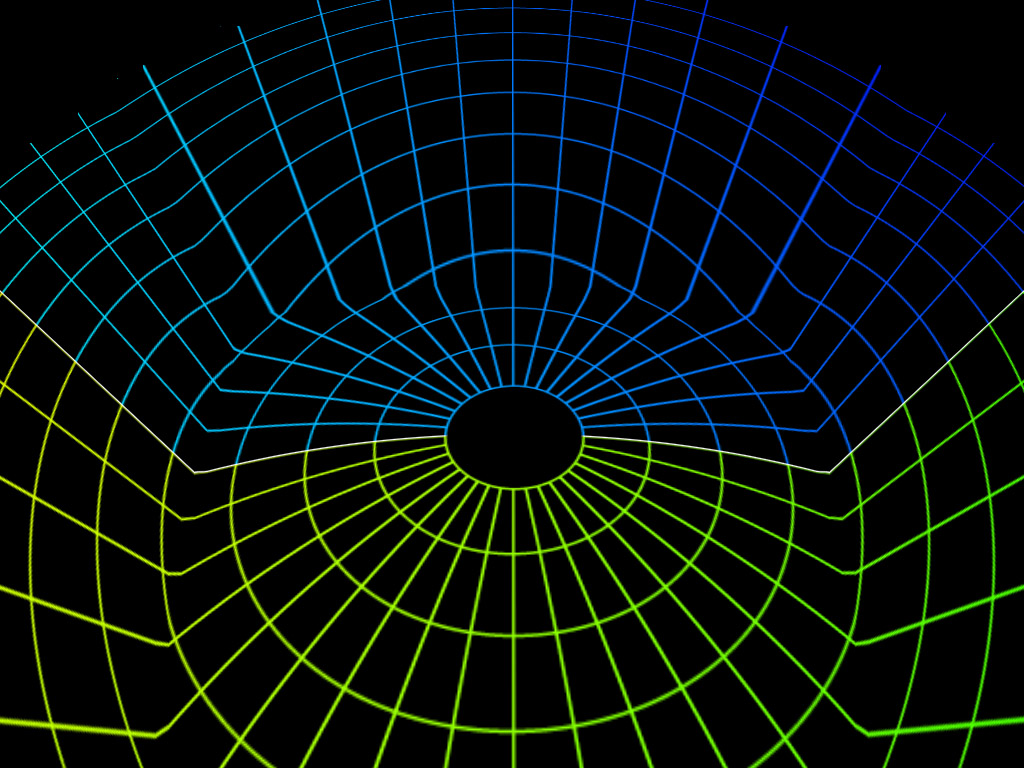
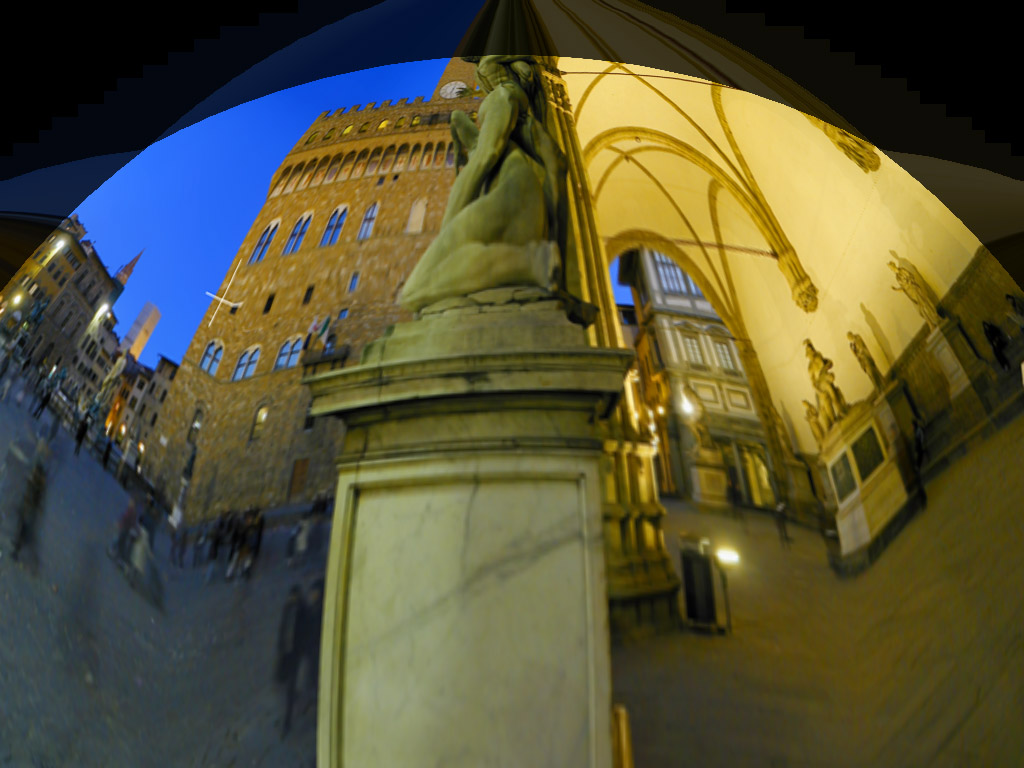
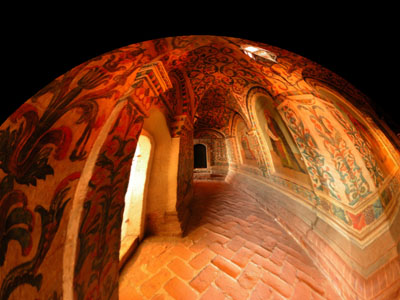
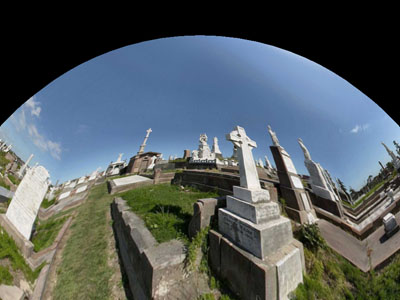
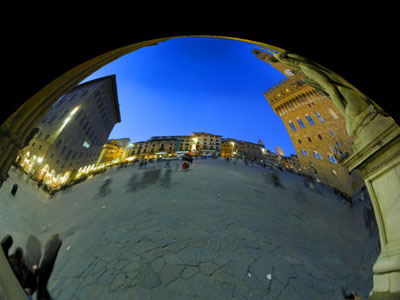
Examples from fisheye projections
Two examples are shown below, in each case the input image is a
fisheye projection.
The images on the right, when projected using the mirror system would appear
undistorted in the room. For example, the radial lines in the first example (right) would
appear straight. The circular lines are spaced at 7.5 degrees, so on the horizon the
field of view is about 135 degrees. The view from the midpoint to the floor is
about 34 degrees. It should be stressed that almost any field of view can be
achieved, the price however
for a wider field of view is resolution and pixel efficiency.
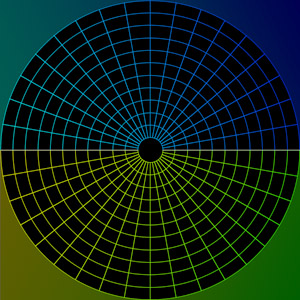
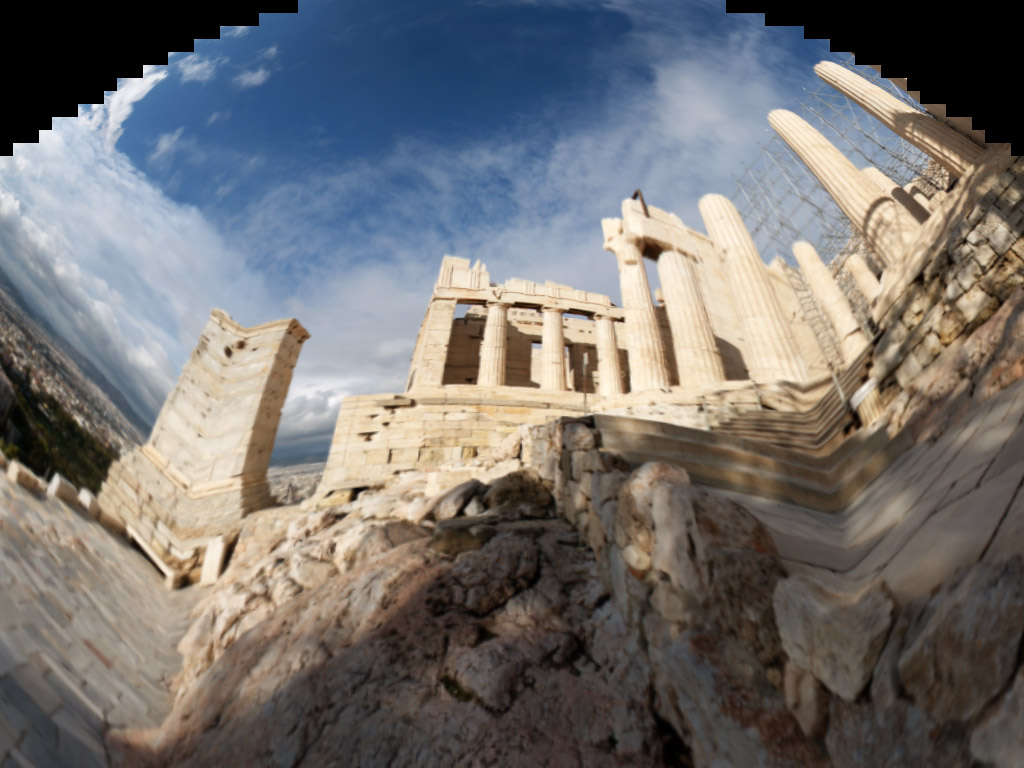
Original fisheye image
|
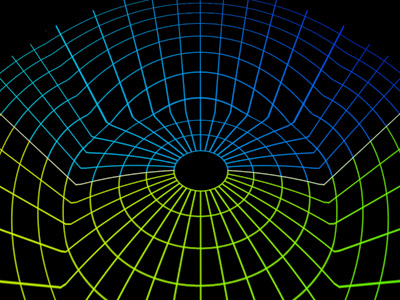
Warped version for projection
|

Original fisheye image
Image courtesy of Greg Downing
|

Warped version for projection
|
|
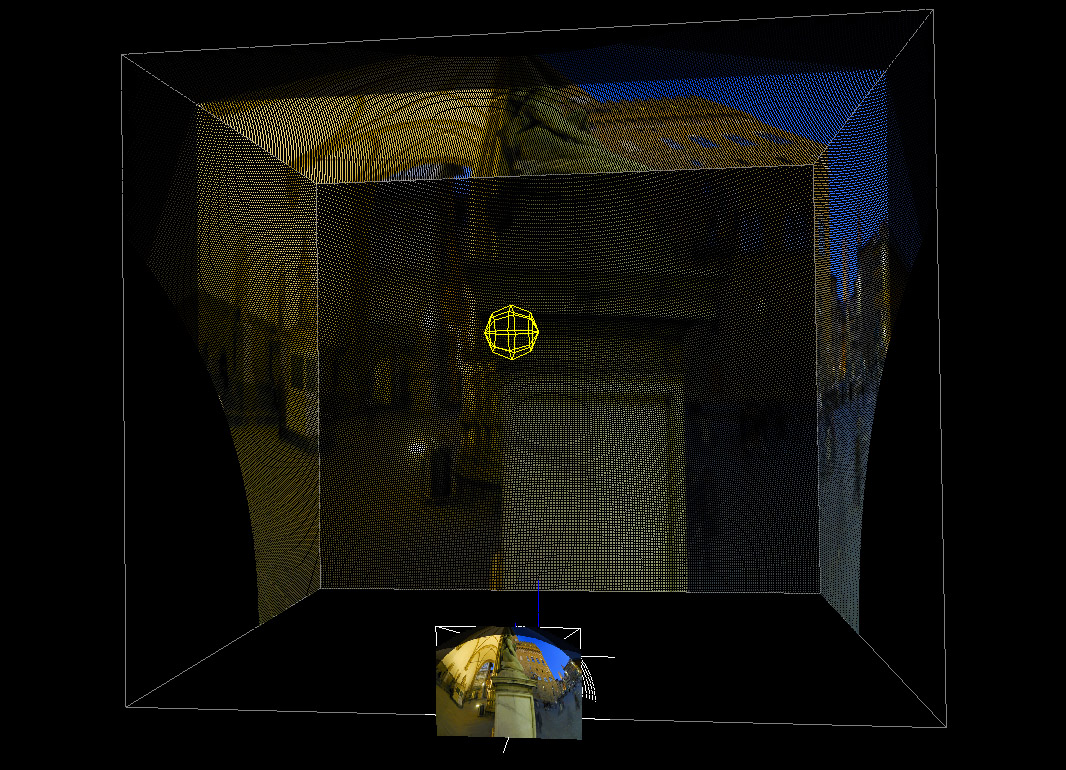
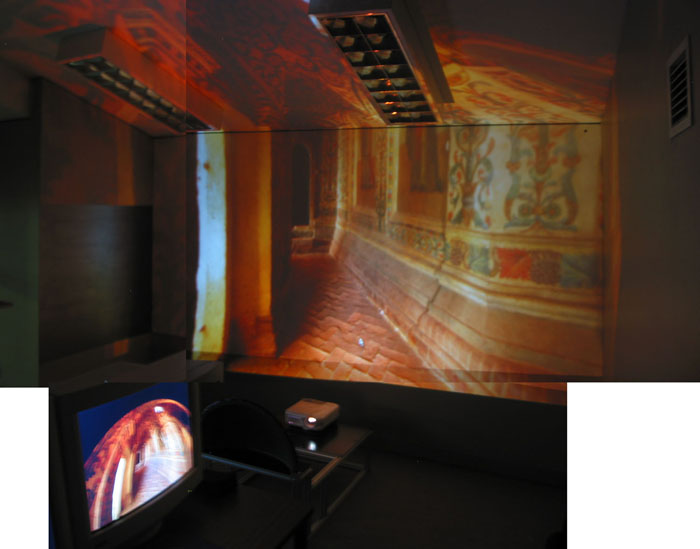
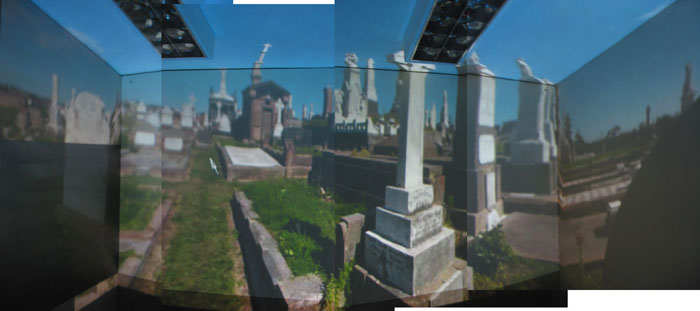
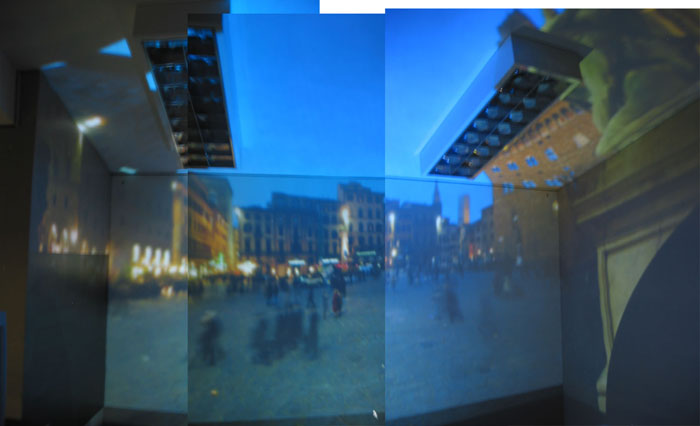
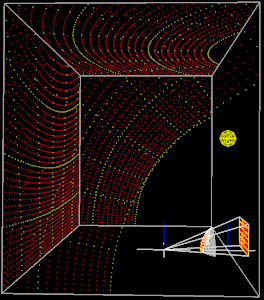
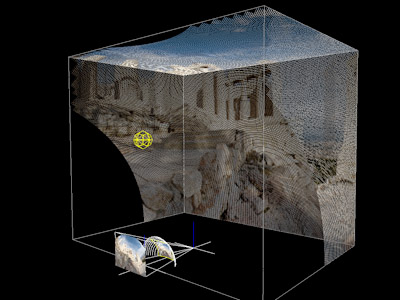
Simulation of the warped image into the environment, of course the result
shown here
doesn't look totally seamless across the corners of the room because
this view is not located at the correct viewer position (yellow sphere).
In all wide FOV immersive environments the view is only strictly correct for the
observer in a single position, namely the position the scene is rendered for. For
flat screen displays we don't usually notice the distortion, perhaps because
we are so used to viewing such images. The distortion is very obvious in
stereoscopic environments if the observer can move about without view frustum
correction (normally using some form of head tracking). In a planetarium dome
the distortion is likely to less obvious to the case here because a planetarium
dome doesn't have the sharp discontinuities found in a rectangular room.
|
Examples using wide FOV perspective projections
Perspective image, 135 (horizontal) degree FOV
|
Warped version for projection
|
Perspective image, 135 degrees FOV
|
Warped version for projection
|
|
Creating a wide field of view perspective projection is likely to be easier for most
existing software, however when this is extended to angles greater than 100 degrees the pixel
efficiency is rather poor.
There are other projections in common usage in immersive environments,
for example
cylindrical projections
and cubic maps. Both of these can
ready be warped using the same principles used above and would be significantly
better than using perspective projections. The author would recommend using
cubic maps, that is, multiple passes where each one captures a 90 degree FOV.
The resulting views (typically 4 from left, right, top, bottom) are each applied
as a textures to a
textured mesh.
|
Further comments
The depth of focus for a particular projector will dictate how well the images
are focused across the variable light path lengths involved.
The more of the side walls illuminated, the fewer pixels are used vertically.
The wider the FOV the less suitable is a perspective projection as the input
image. Using cubic, cylindrical, or fisheye input reduces the existing software
options.
Can the lighting and surface illumination be controlled sufficiently to
sufficiently "hide" the corners (?)
While it isn't terribly difficult to create the appropriate wide angle images
using custom OpenGL code, it is rare to find such support in existing game engines.
The way the warping here is applied requires that the software can render the
scene in two passes, one that creates the wide field of view image (cylindrical,
perspective, fisheye....) and then draw that as a texture on the warping mesh
created by the simulation software discussed above. Warping pre-rendered images
and movies is straightforward.
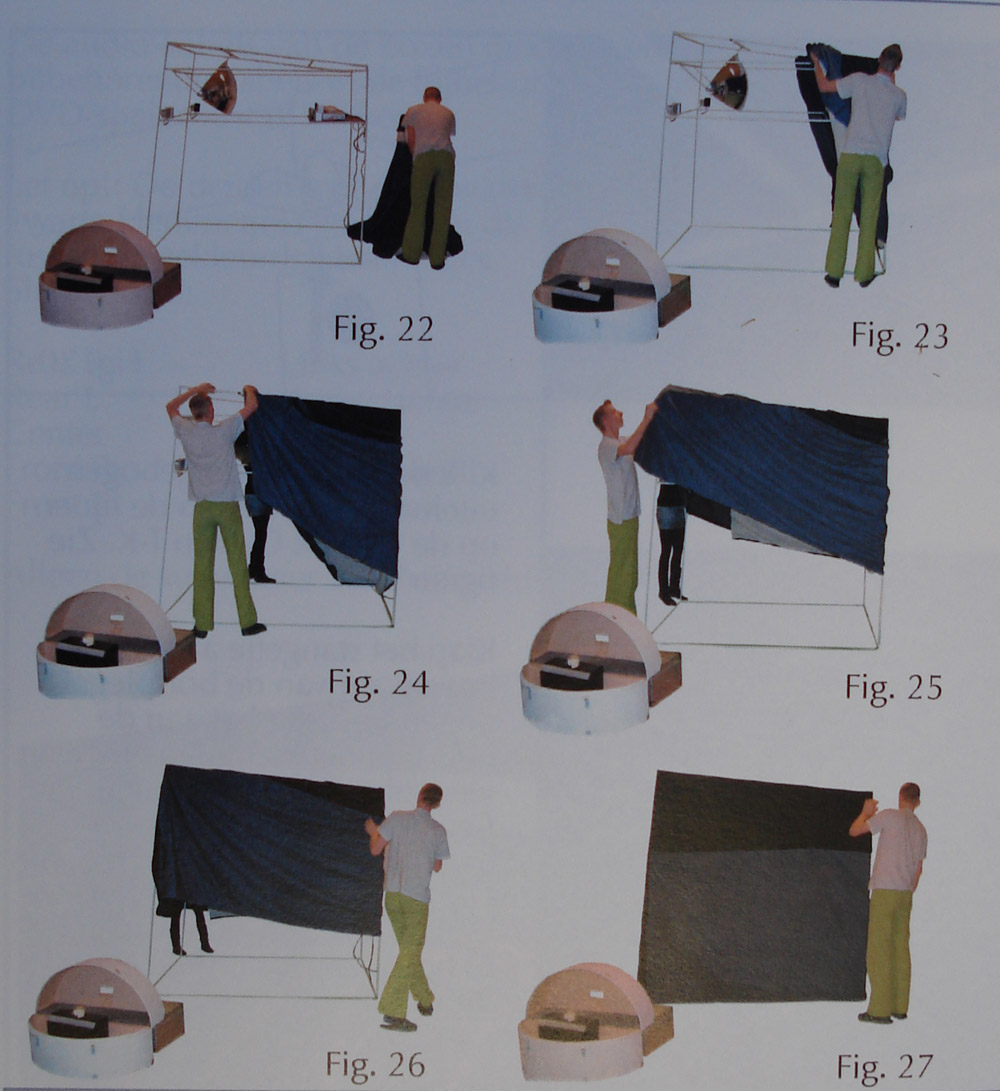
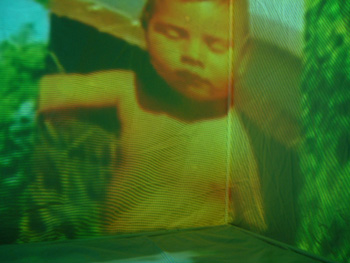
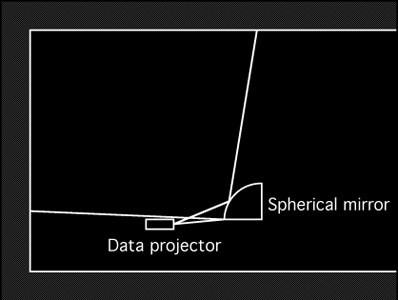
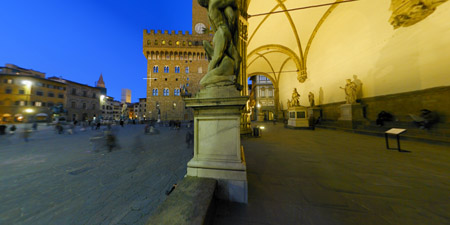
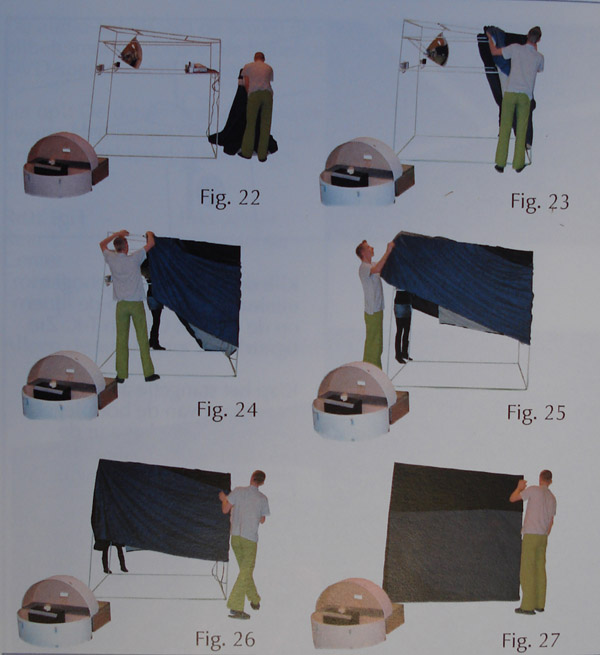
Projector Rigging
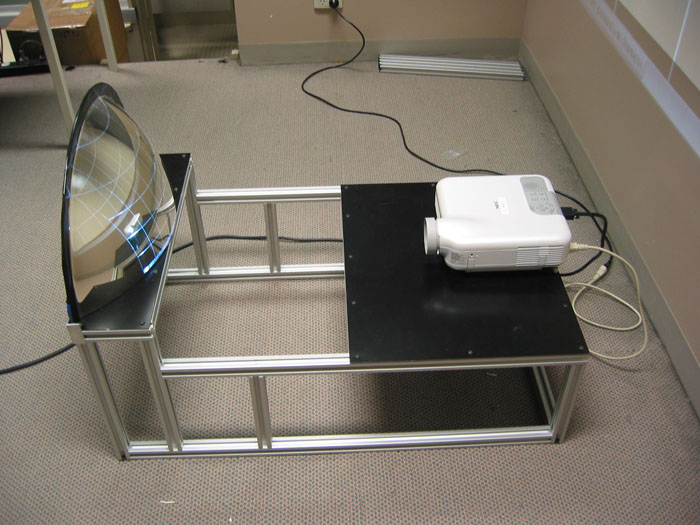
Example 1
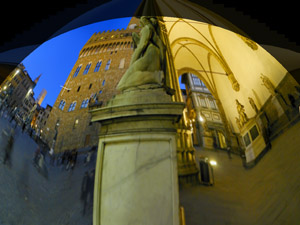
Example 2
Image courtesy of Peter Murphy
Example 3
Simulation
Appearance of fisheye image
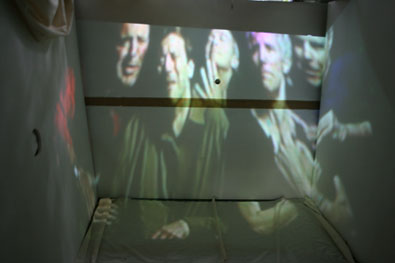
Example 4 - different room
Please excuse poor stitching.
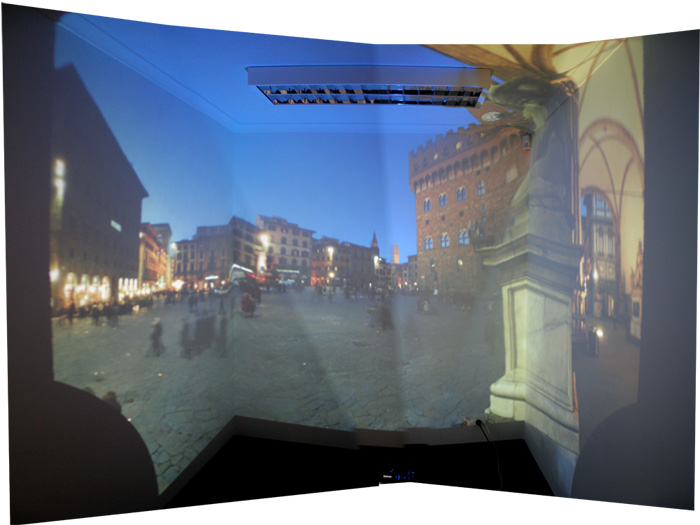
Notes
The photos here are more blurred than they appear in real life. They were captured
using a long exposure (it's a dark room) without a tripod.
Not all straight lines that cross the corners appear straight in the photos, they
do in real life. The photos were taken well away from the correct viewing position
standing directly behind the mirror.
Unfortunately the wall on the left has been painted with a low gain silver paint
so it doesn't reflect light very well on an angle.
In this arrangement the wall is very long rather than squarish, as such the
focus is poorer on the side walls. In terms of using this for immersion the out
of focus region is in ones peripheral vision so not a problem at all.
Example 5: Student project in the Netherlands
Nina Hirschberg, Timo Klok
Wide angle lens multipliers
Written by Paul Bourke
May 2021
An alternative is to use fisheye or partial lenses. In the case below the 3.5x multiplier
lens from Navitar is use to cover the three walls and portions of the floor and ceiling
of a rectangular room. The advantage of this lens is that it is applied external to
the projector, as such, one can use a wide range of projectors.
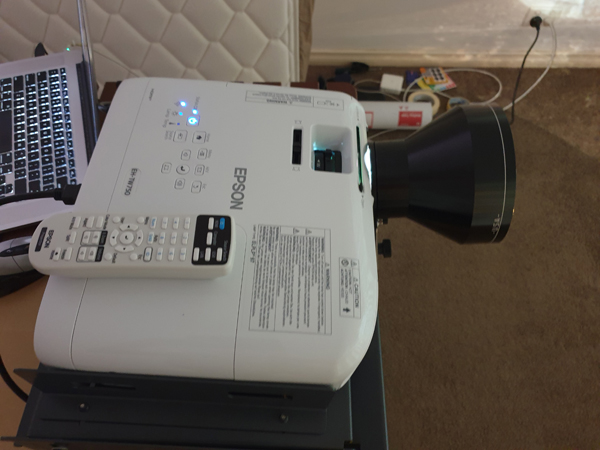
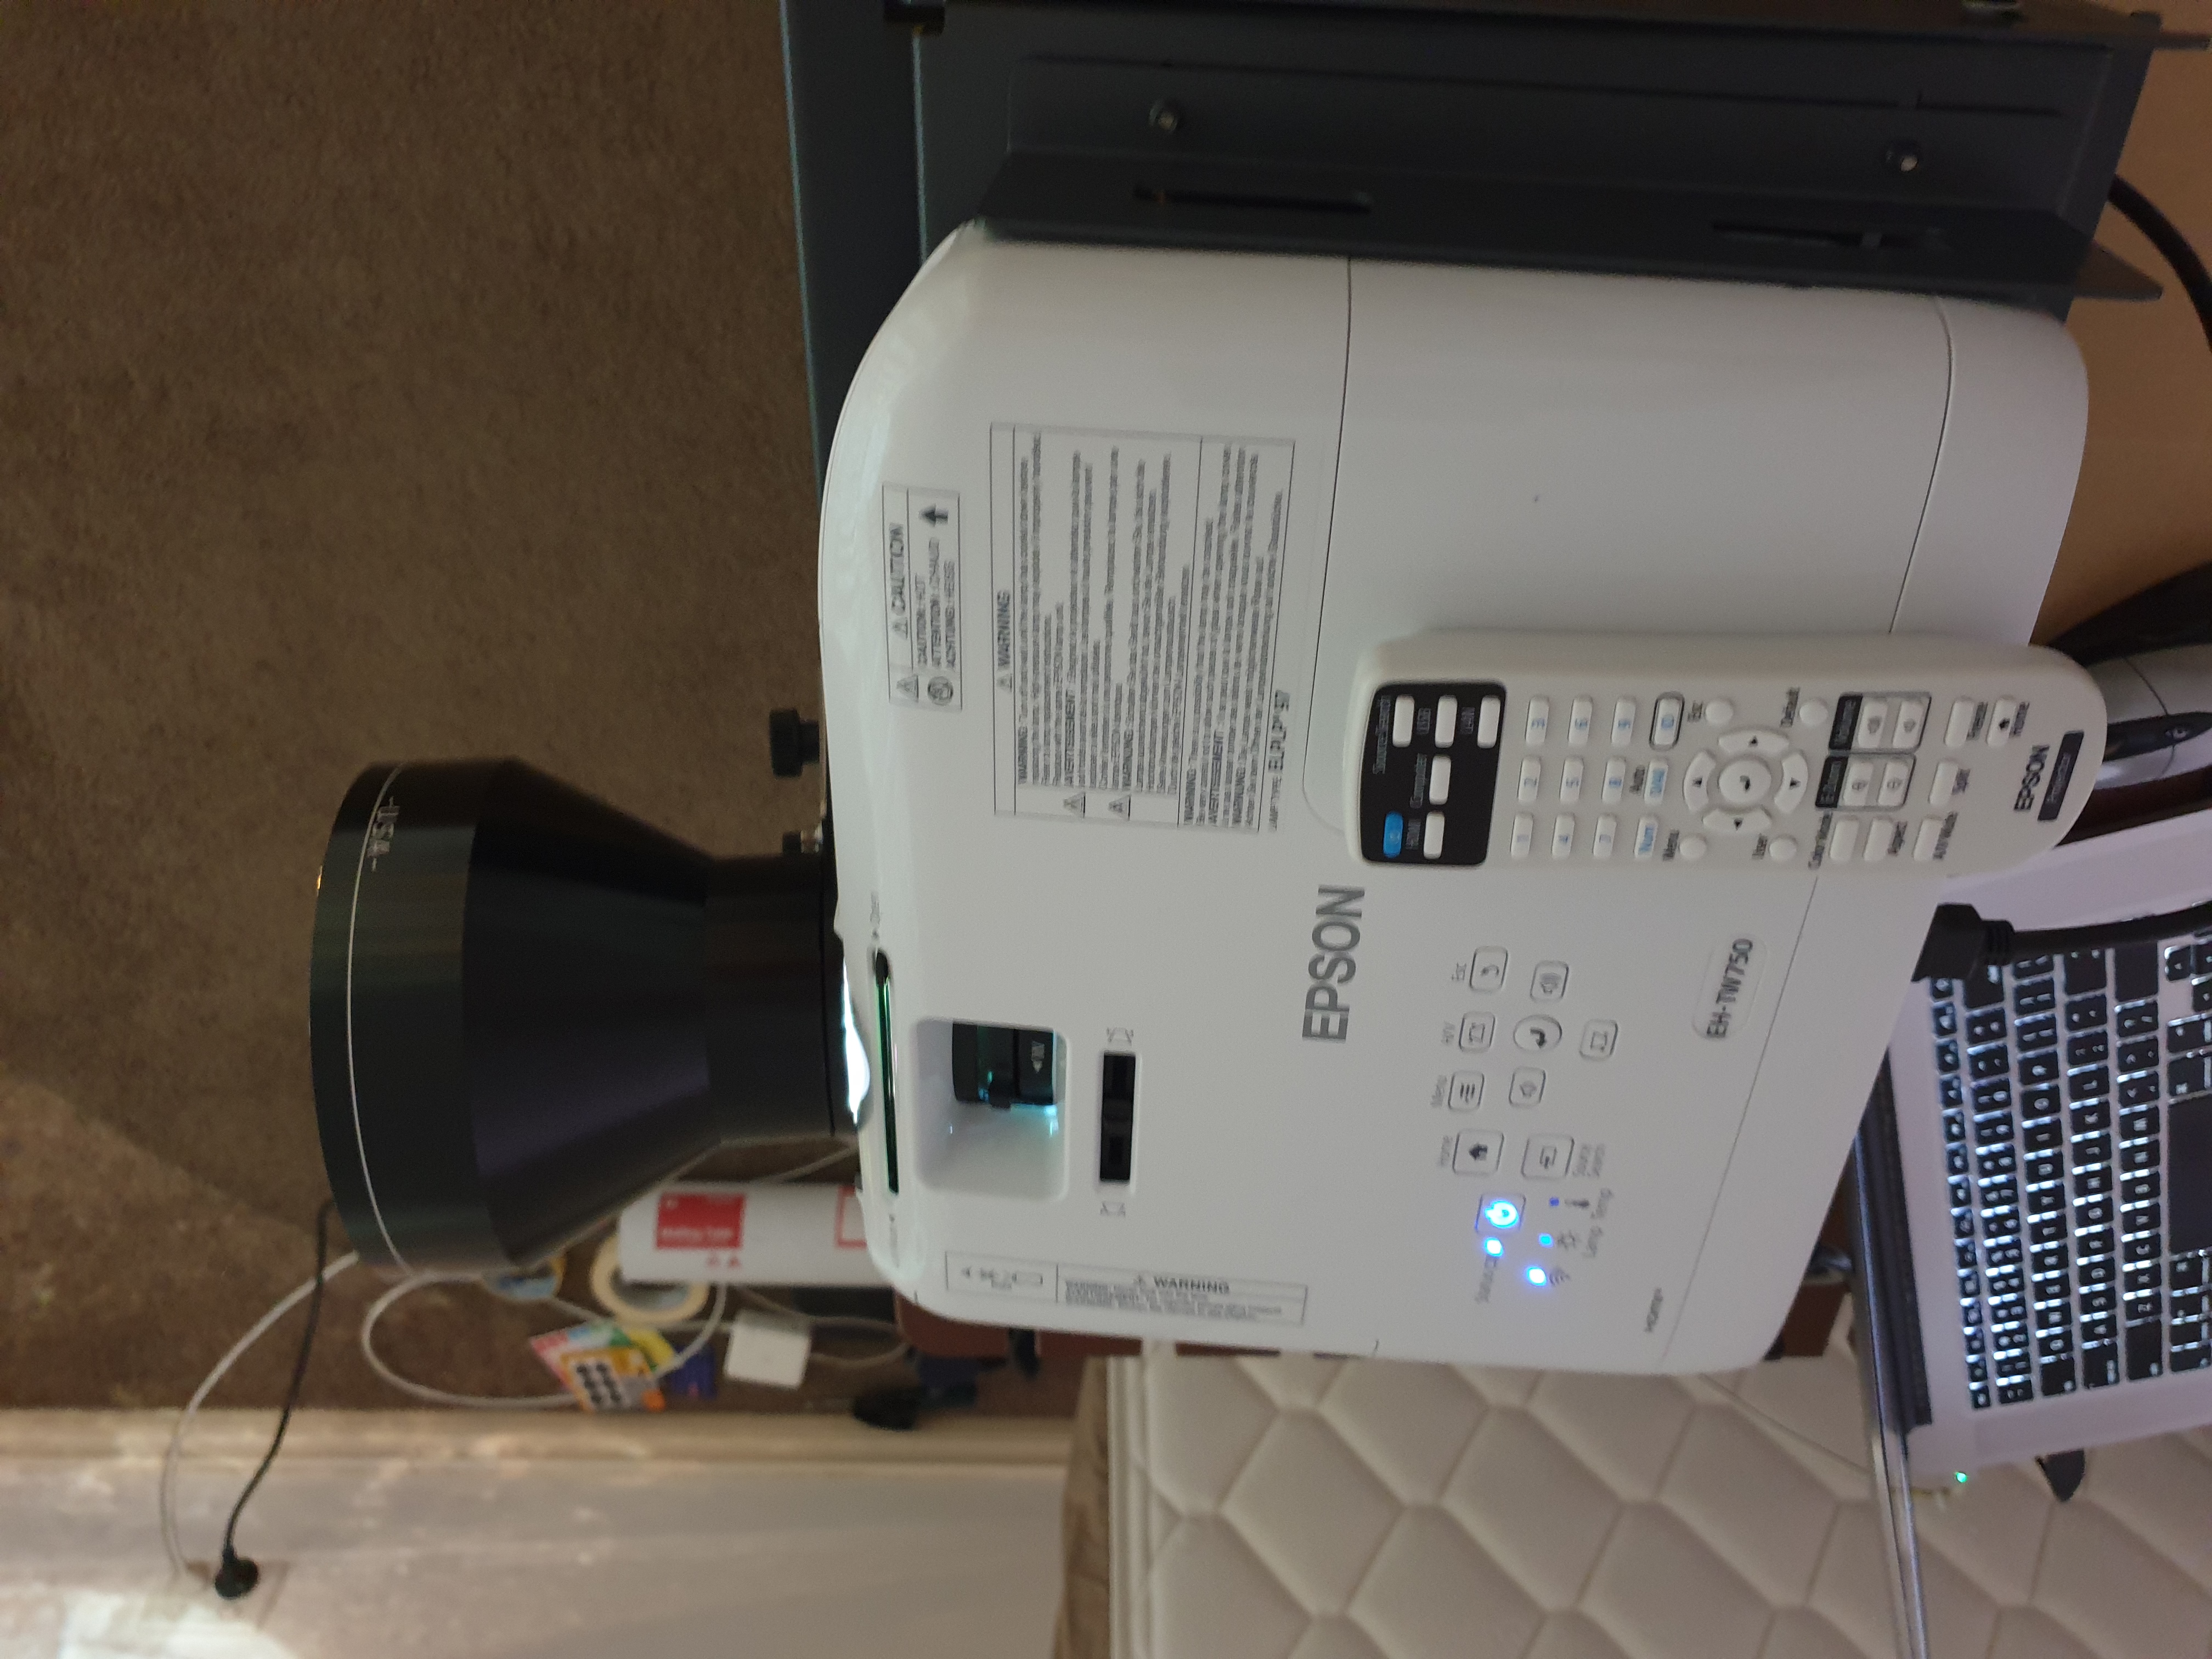
Projector and lens arrangement.
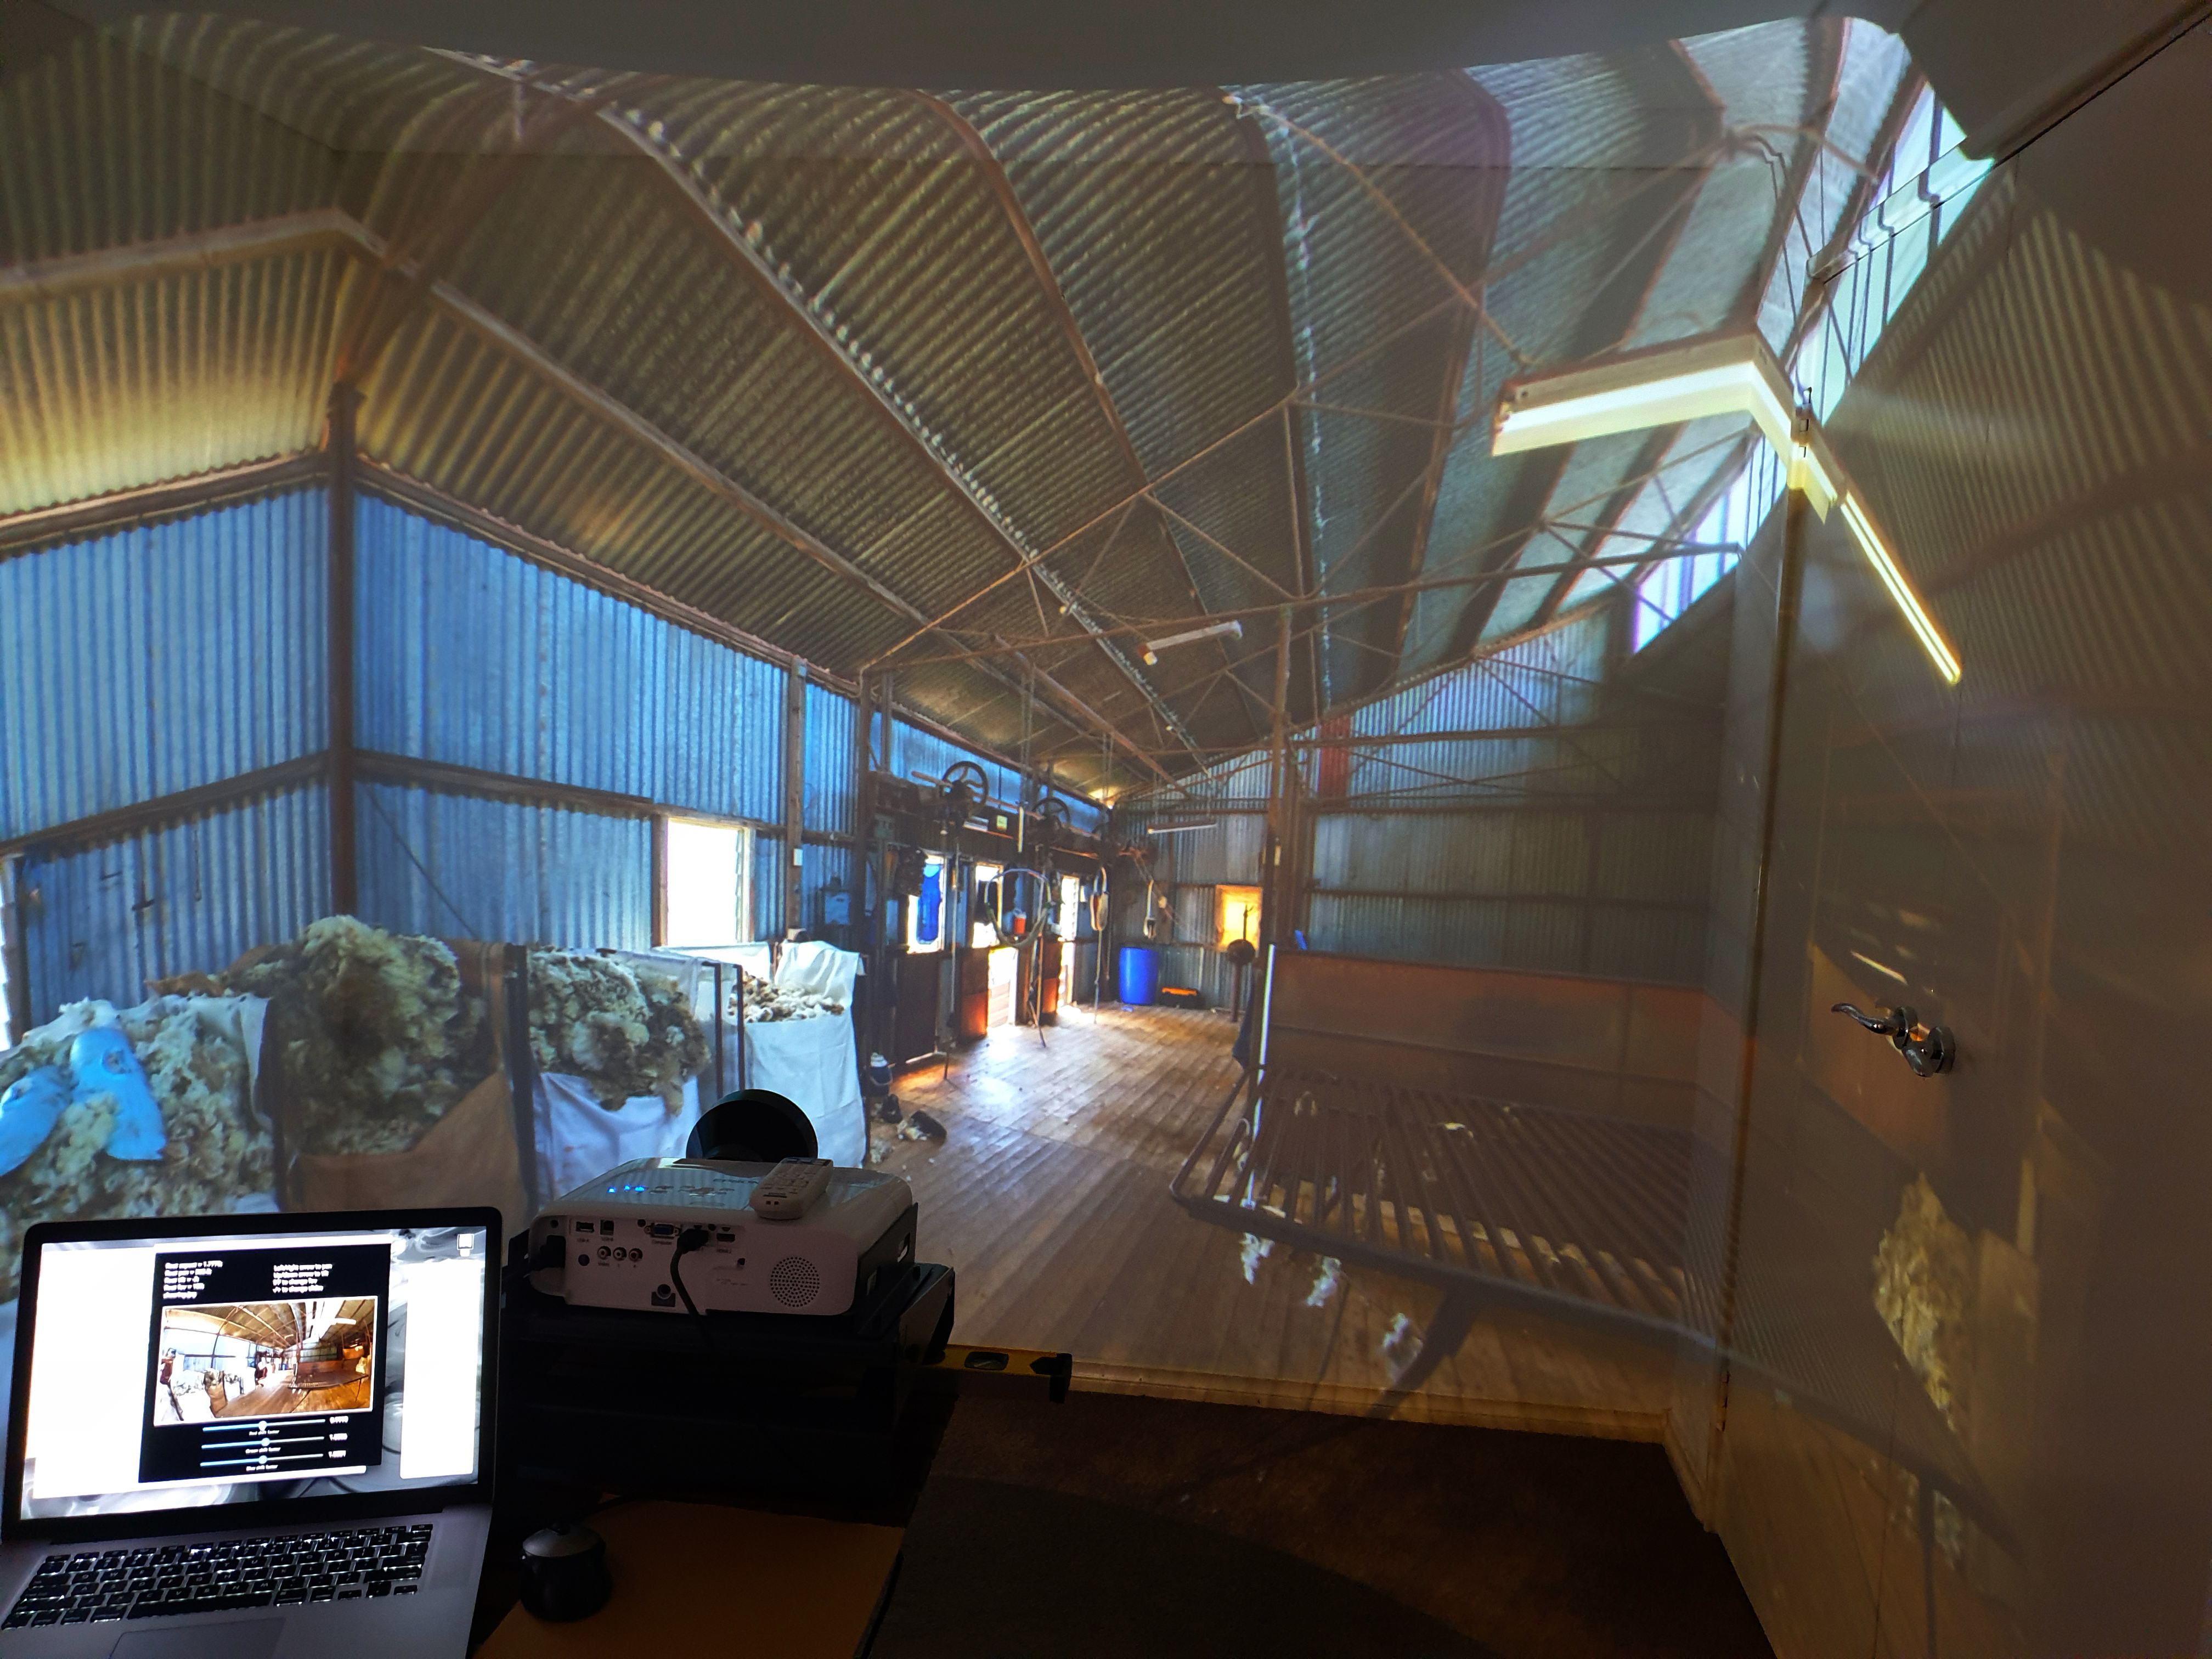
Two examples are shown below, noting that the geometry only look corect from a
central position, as opposed to theposition from which these photographs are taken.
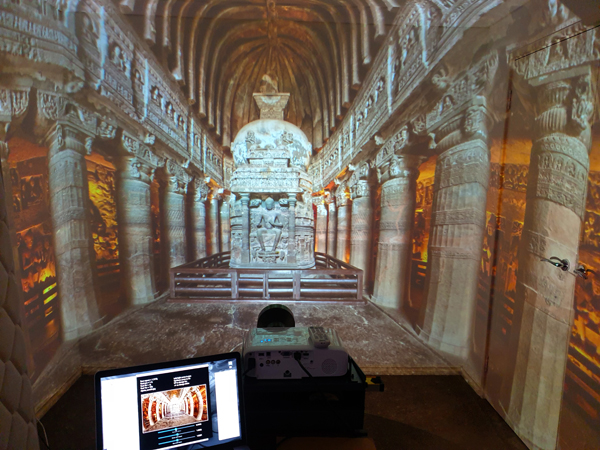

|