Quad fisheye mapping to a 360 panorama
or
What does it look like being on a mountain top engulfed by fire?
In collaboration with HPWREN (High Performance Wireless
Research & Education Network)
Example taken from Bush fire monitoring on the Santa Ynez North Peak, 8th July 2017
News story
Navigable YouTube video of time lapse sequence.
Written by Paul Bourke
August 2017
The history of panoramic photography dates back to the very earliest days
of photography in 1840s. Techniques to photographically capture panoramas
have continued to evolve including the development of bespoke camera systems.
With new presentation devices such as cylindrical projection systems and
head mounted displays that allow the panorama to convey an immersive sense
of a place, there has been considerable effort in developing cameras to
record panoramic video. Single camera designs capable of recording 360
video are simple and easily create seamless panoramas but have the
disadvantage of not scaling in resolution. Higher resolution requires
rigs consisting of multiple individual cameras. The overlapping images
from each camera are fused together to form the final panorama. The
challenges for these multiple camera systems involves minimising the
inevitable parallax errors
[1]
and creating a constant colour
grade, the success of these determines how seamless the panorama will appear.
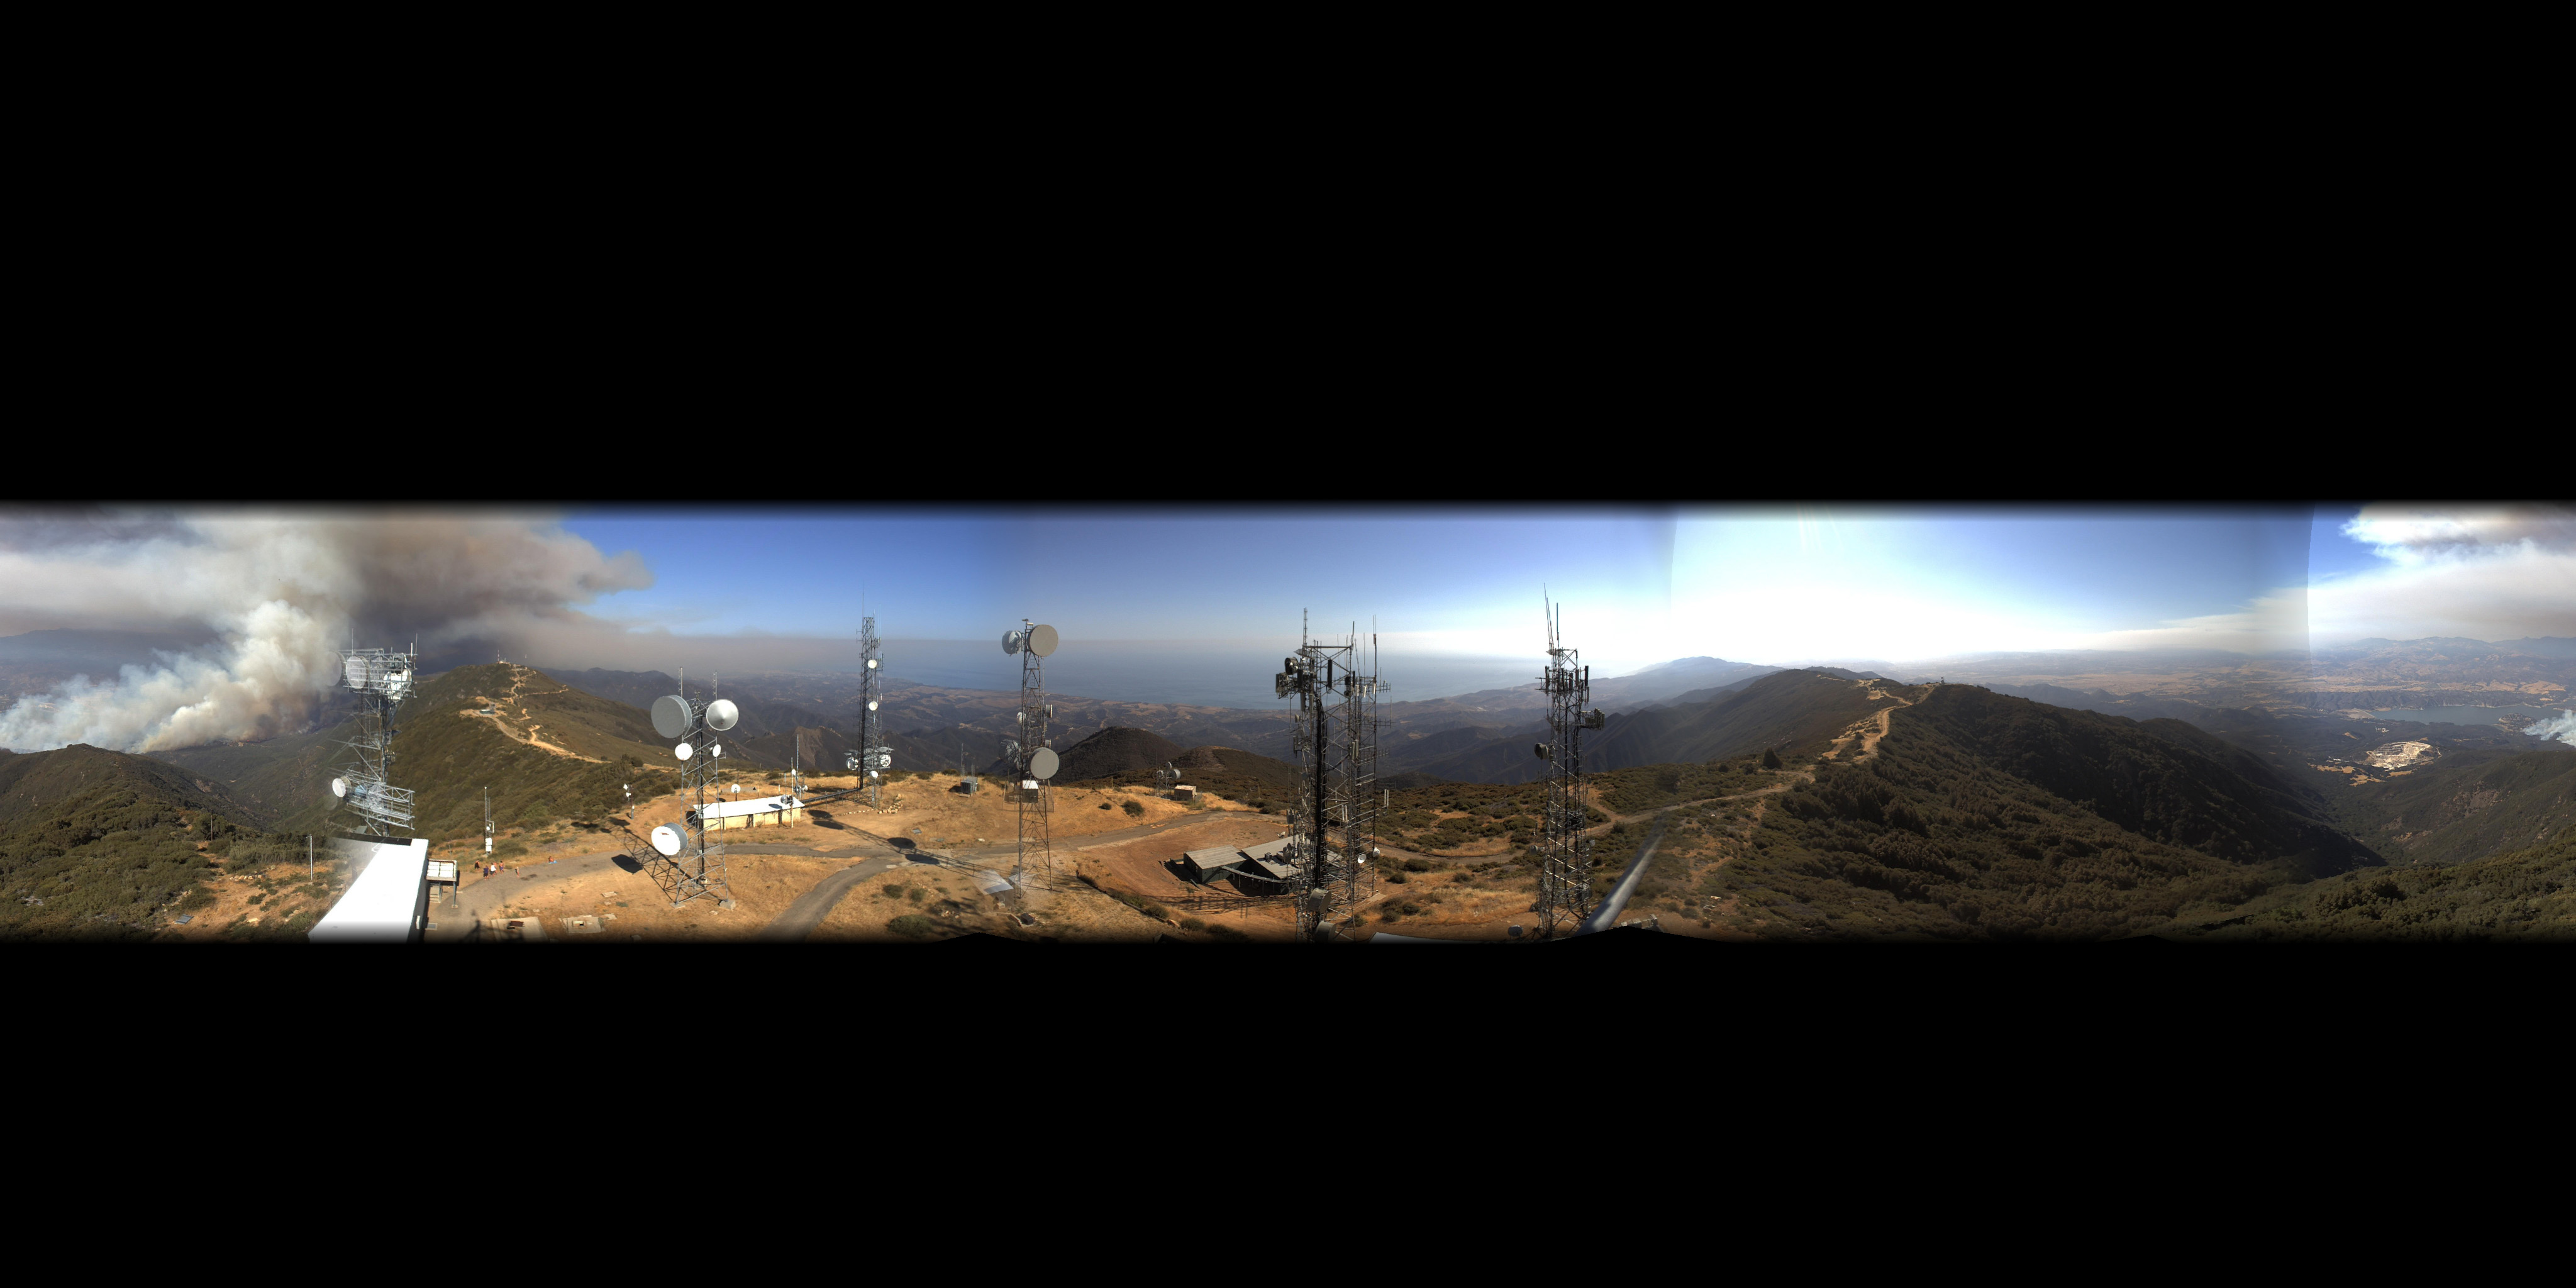
Figure 1
shows a single time snapshot from four cameras mounted on Santa
Ynez North Peak on the 8th July 2017. Each camera has field of view (FOV)
greater than 90 degrees horizontally and thus captures everything visible
(within a limited vertical FOV) from the position of the camera. While
these 4 images capture the entire horizontal field of view, as they
stand they present a distorted and disconnected view, a form not
directly useful for current virtual reality (VR) experiences. A
frequently used approach to forming suitable panoramas is to use
machine vision to find feature points between the images, that is,
points on the same object between adjacent images. Once these points
are found the images can be warped and blended together, aligning the
feature points, to form the panorama. This approach can lead to
spatial distortion but is unsuited in this case because there is
not sufficient overlap to find enough reliable feature points, and feature points
are rarely found in clear blue sky.

Figure 1: Four source fisheye camera images
The approach used here is to model the key optical and geometric
properties of the camera system. This includes the field of view of
the fisheye lenses and the camera orientations. Armed with this
parameterised model one can project the fisheye images onto the
appropriate geometry required for the final panorama. The images
would be projected onto a cylinder for a cylindrical panorama, or
as in this case, projected onto a sphere to form an equirectangular
projection. Figure 2 shows the equirectangular projection corresponding
to the 4 images in figure 1. The equirectangular projection is the
most commonly used format for VR applications, it extends 360 degrees
horizontally and 180 degrees vertically. Each fisheye image is
responsible for exactly one quarter of this image horizontally. Since
the lenses are slightly greater than 90 degrees the overlap between
each quarter is used to blend the images together thus reducing the
visibility of the seam.

Figure 2: Equirectangular projection, 360 degrees in longitude horizontally, 180 degrees
in latitude vertically.
The missing part is how to measure the optical and geometric properties
of each camera, noting that the author did not have access to the
cameras and there is often a 5% variation in commodity optical elements.
An interactive application was developed that allows the operator to
manually adjust the important parameters and get immediate feedback on
the consequences on the alignment of features in the scene.
Figure 3 is
a screen dump of this application.
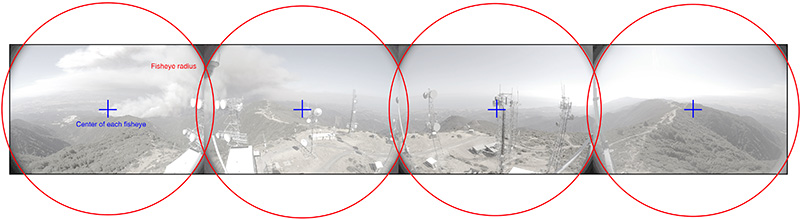
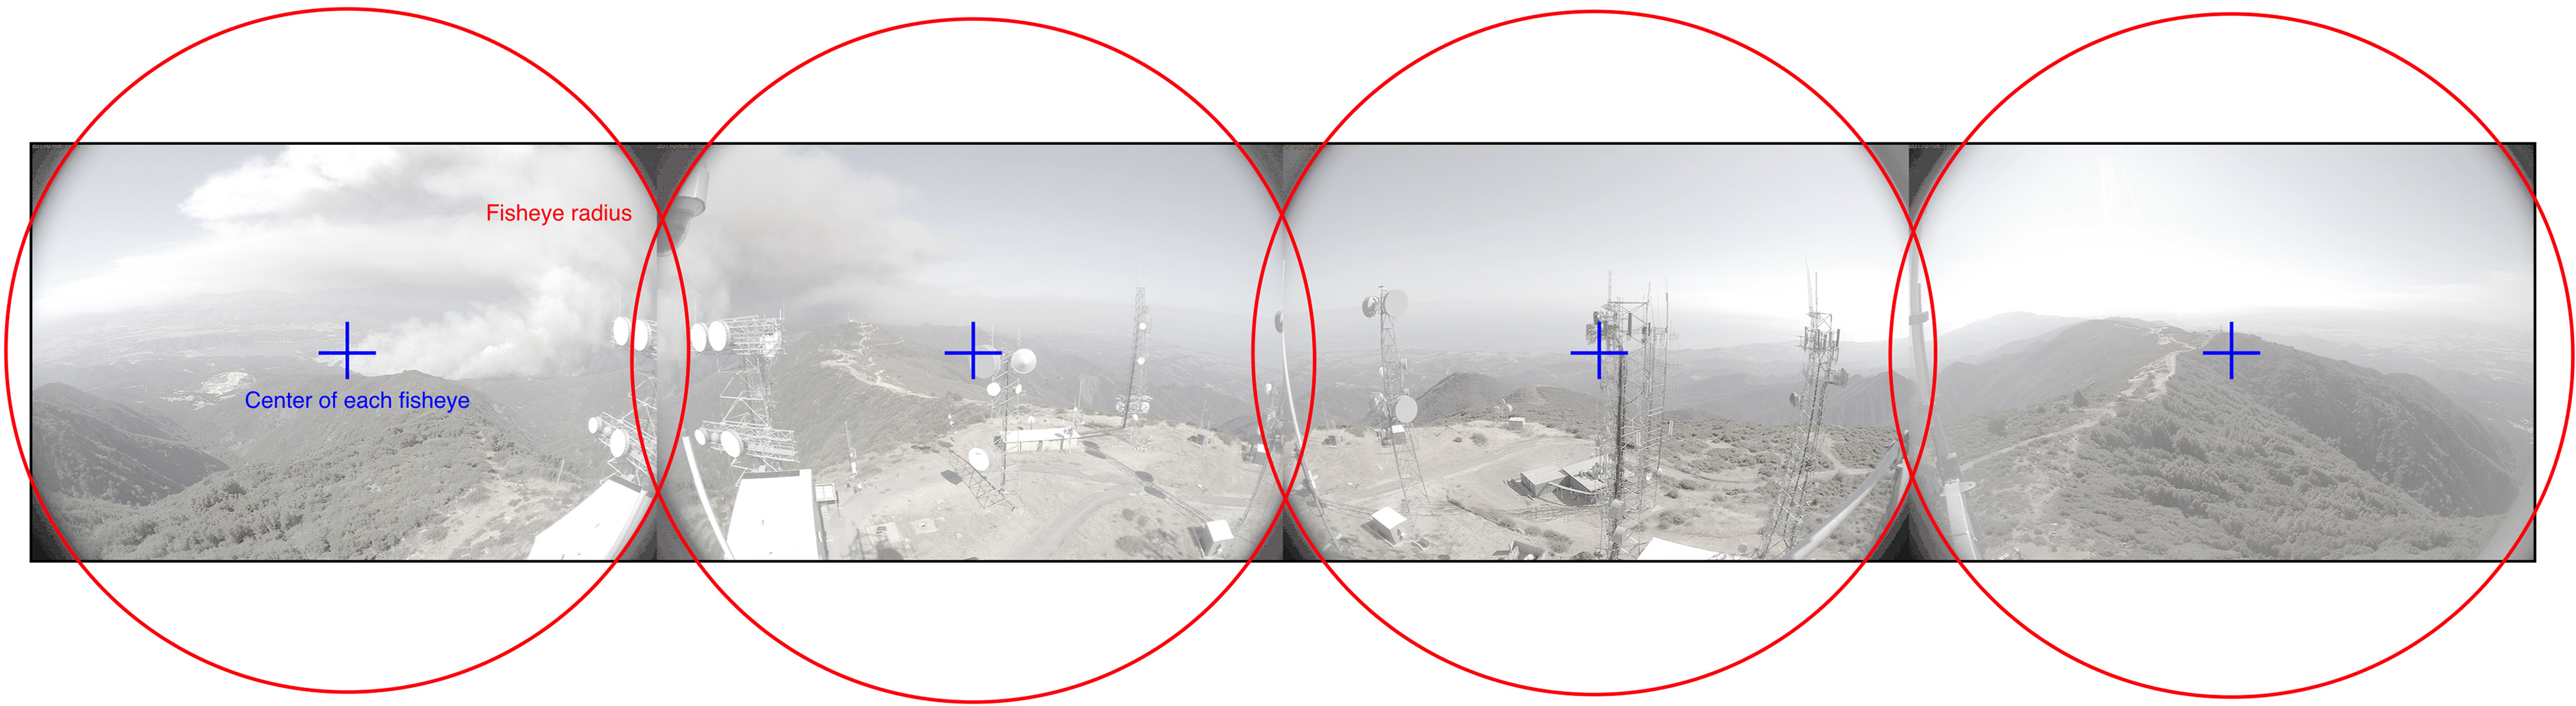
Figure 4: Center and radius of each fisheye.
Using the mouse and keyboard one can
adjust the lens FOV, the position of the fisheye on the camera sensor
and the orientation of the cameras. For example, each of these cameras
is tilted downwards by about 9 degrees.
As well as the field of view and camera angles, the software requires
the center and radius of each fisheye, see figure 4.
Once the desired alignment is
achieved the parameters are saved to a file and used in the subsequent
processing of frames. Such a parameter file is shown below, the image files
can be concatenated together as in figure 1 or
separate image files.
ID: 0
IMAGE: c.jpg
RADIUS: 1600
CENTER: 1584 1074
FOV: 120.99
ROTATEX: -9.0

ID: 1
IMAGE: c.jpg
RADIUS: 1600
CENTER: 1504 1012
FOV: 115.99
ROTATEX: -9.0

ID: 2
IMAGE: c.jpg
RADIUS: 1600
CENTER: 1536 1024
FOV: 111.99
ROTATEX: -9.0

ID: 3
IMAGE: c.jpg
RADIUS: 1600
CENTER: 1492 1024
FOV: 106.99
ROTATEY: -0.99
ROTATEX: -9.0
It should be noted here that due to fundamental
parallax issues it is not possible to achieve a perfect alignment
across all depths, only at a single depth
[1].
The goal here
was to achieve a good alignment for distant objects. Additionally,
these cameras are not colour calibrated and operating in automatic
exposure mode so colour differences between each quarter is to be expected.
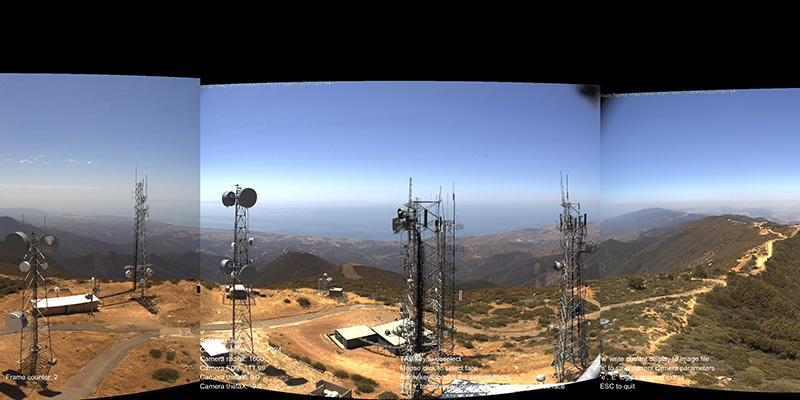
Figure 3: Optical/geometric parameter adjustment software
The advantages of 360 panorama image and video are many. If the panorama
is laid out flat as in figure 2 nothing is hidden from view and the
local distortion is minimal. One only need to keep in mind that the
left and right edge are connected. A navigable perspective view can be
presented online
[2]
reducing the distortion entirely while
allowing the operator to look around in real time. There are a number
of surround presentation devices that have been built to give a sense
of immersion both without the need to wear anything and providing a
more social experience. Examples might be the iDome
[3]
or the AVIE cylinders
[4]. When viewed within a VR head
mounted display one gets an undistorted view while being able to
naturally turn around as one might in real life, the ultimate sense
of "being there".
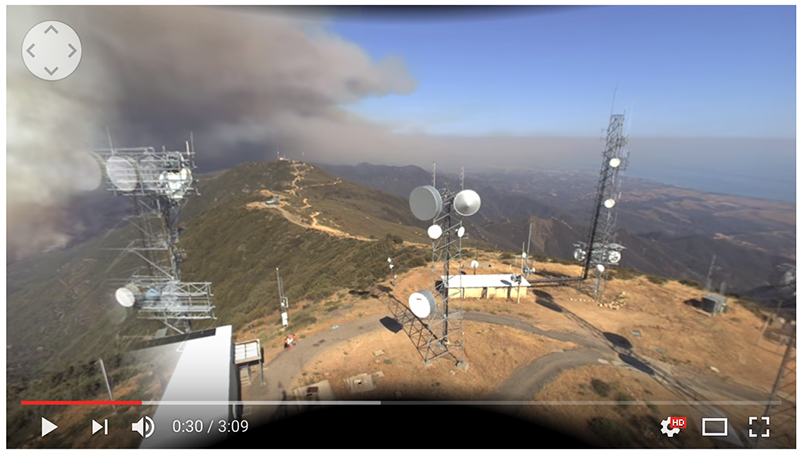
(Click for navigable YouTube video of time lapse sequence)
Online references
Fundamental parallax issues explained.
Timelapse sequence from which
figure 2 is a one frame.
iDome immersive display, presenting a 180 degree view and mouse navigation
AVIE - Advanced Visualisation and Interaction Environment
|